Example: CliMAF WPS
In this example we are creating a Web Processing Service for CliMAF.
Create WPS using Cookiecutter
We create an initial WPS with Cookiecutter and the bird-house/cookiecutter-birdhouse WPS template.
Install Cookiecutter using Conda:
$ conda install -c conda-forge cookiecutter
Run Cookiecutter with the WPS template:
$ cookiecutter https://github.com/bird-house/cookiecutter-birdhouse.git
Cookiecutter will ask you a few questions, here the answers for the CliMAF WPS:
full_name [Full Name]: Mary Stuart
email [your@email]: mary@stuart
github_username [bird-house]: cp4cds
project_name [Babybird]: CliMAF WPS Demo
project_slug [climaf_wps_demo]: climafwps
project_repo_name [climafwps]: climaf_wps_demo
project_short_description [A Web Processing Service for Climate Data Analysis.]: A Web Processing Service for CliMAF.
version [0.1.0]: 1.1.0
Select open_source_license:
1 - Apache Software License 2.0
2 - MIT license
3 - BSD license
4 - ISC license
5 - GNU General Public License v3
Choose from 1, 2, 3, 4, 5 [1]: 1
http_port [5000]: 5000
A project folder climaf_wps_demo is created with a fully functional WPS and example processes.
Push this project now to GitHub.
You can find the result in our CP4CDS GitHub project.
Add a CliMAF process
We will add now a time series plot process based on CliMAF functionality to the WPS.
First, we need to add the climaf dependency to the existing Conda environment:
Then we add a new Python module for a time series plot generation:
We need to define a WPS process definition for the time series plot where we describe the input and output parameters and provide a short documentation:
You need to activate this process in the __init__ module:
You should extend the tests for the new tsplot process:
An initial Sphinx documentation is part of the WPS ( docs/ ) and can be made
available on ReadTheDocs.
Test CliMAF WPS
You can install the WPS using a Makefile:
$ make clean install
Start the WPS with customized configuration for CMIP5 data archive:
$ source activate climafwps
$ climafwps start -c etc/ceda.cfg -d
The service will be available at the URL:
Check the documentation on ReadTheDocs for details.
Use Ansible for Deployment
We can deploy CliMAF WPS on a host using Ansible.
First, you need to clone the Ansible playbook for WPS:
$ git clone https://github.com/bird-house/ansible-wps-playbook.git
$ cd ansible-wps-playbook
If Ansible is not installed you can bootstrap the installation:
$ bash bootstrap.sh
To install CliMAF WPS you need to edit the custom.yml configration with
the approriate options (hostname, port, CMIP5 archive), for example:
---
# Configuration for CliMAF WPS
wps_name: climafwps
wps_repo: https://github.com/cp4cds/climaf-wps-demo.git
wps_version: master
wps_hostname: wps.demo
wps_port: 80
wps_archive_root: /badc/cmip5/data
wps_config_template: "{{ wps_location }}/{{ wps_name }}/templates/pywps.cfg"
Run Ansible with this configration using a Makefile:
$ make play
Check the documentation on ReadTheDocs for details.
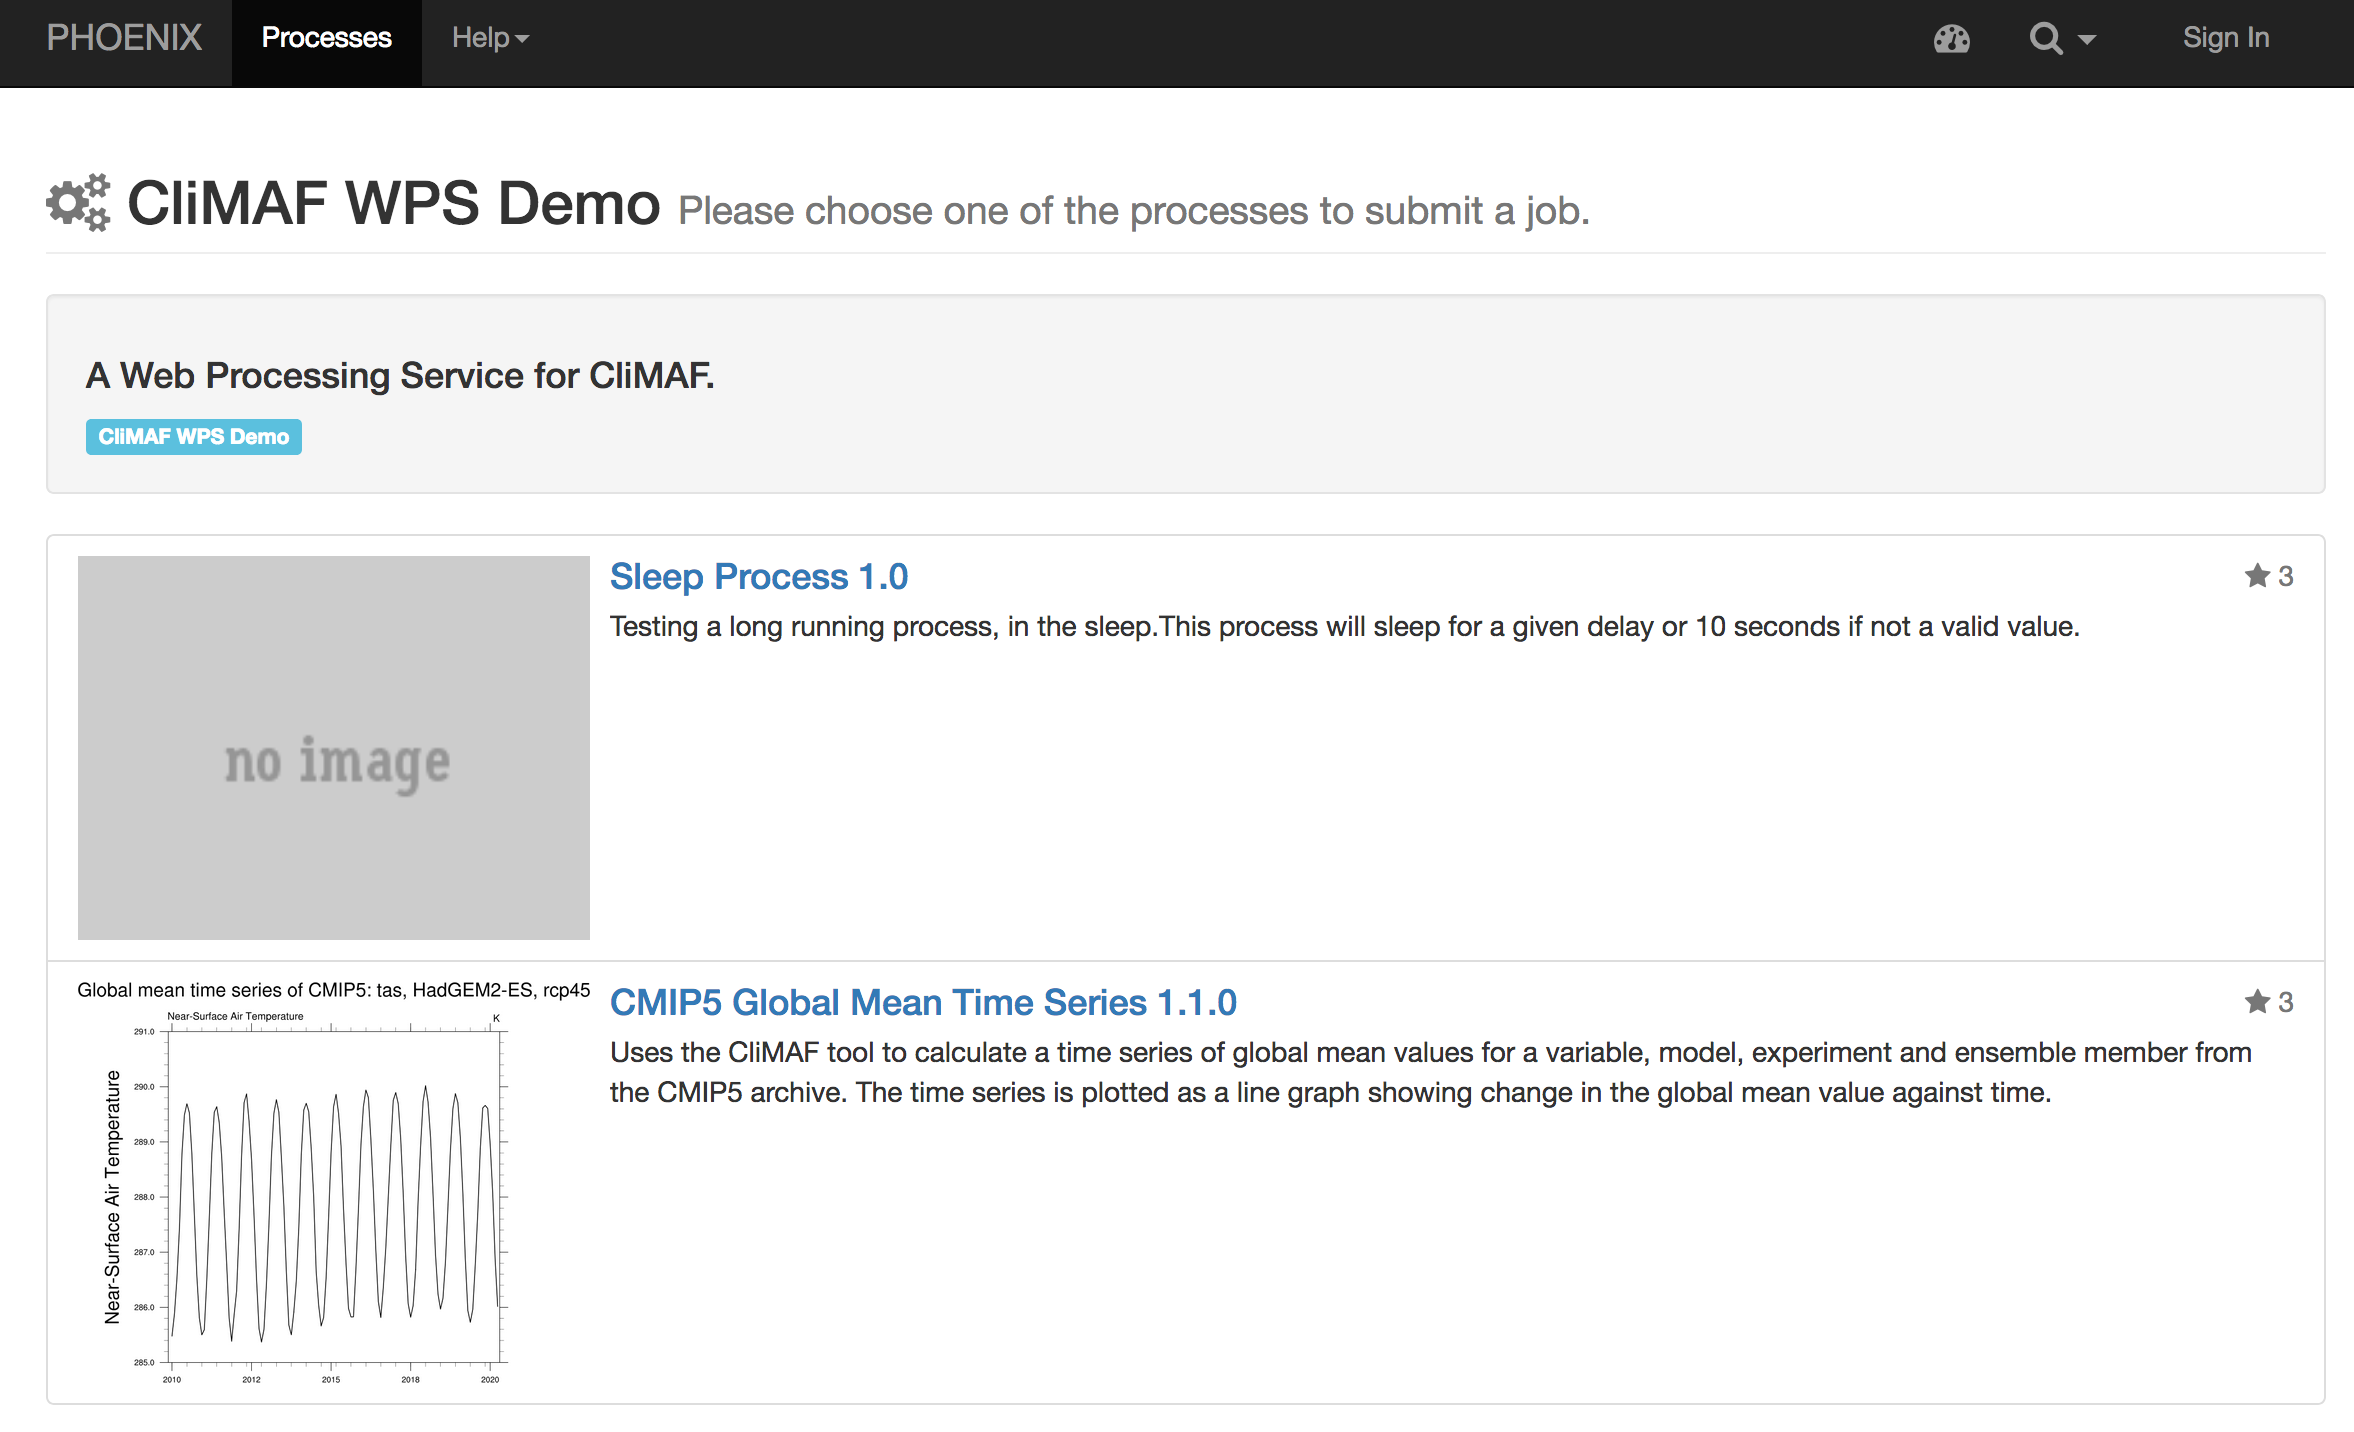
CliMAF Demo
There is a online demo availble with a deployed CliMAF WPS.
You can also try a JupyterLab notebook with a CliMAF example:
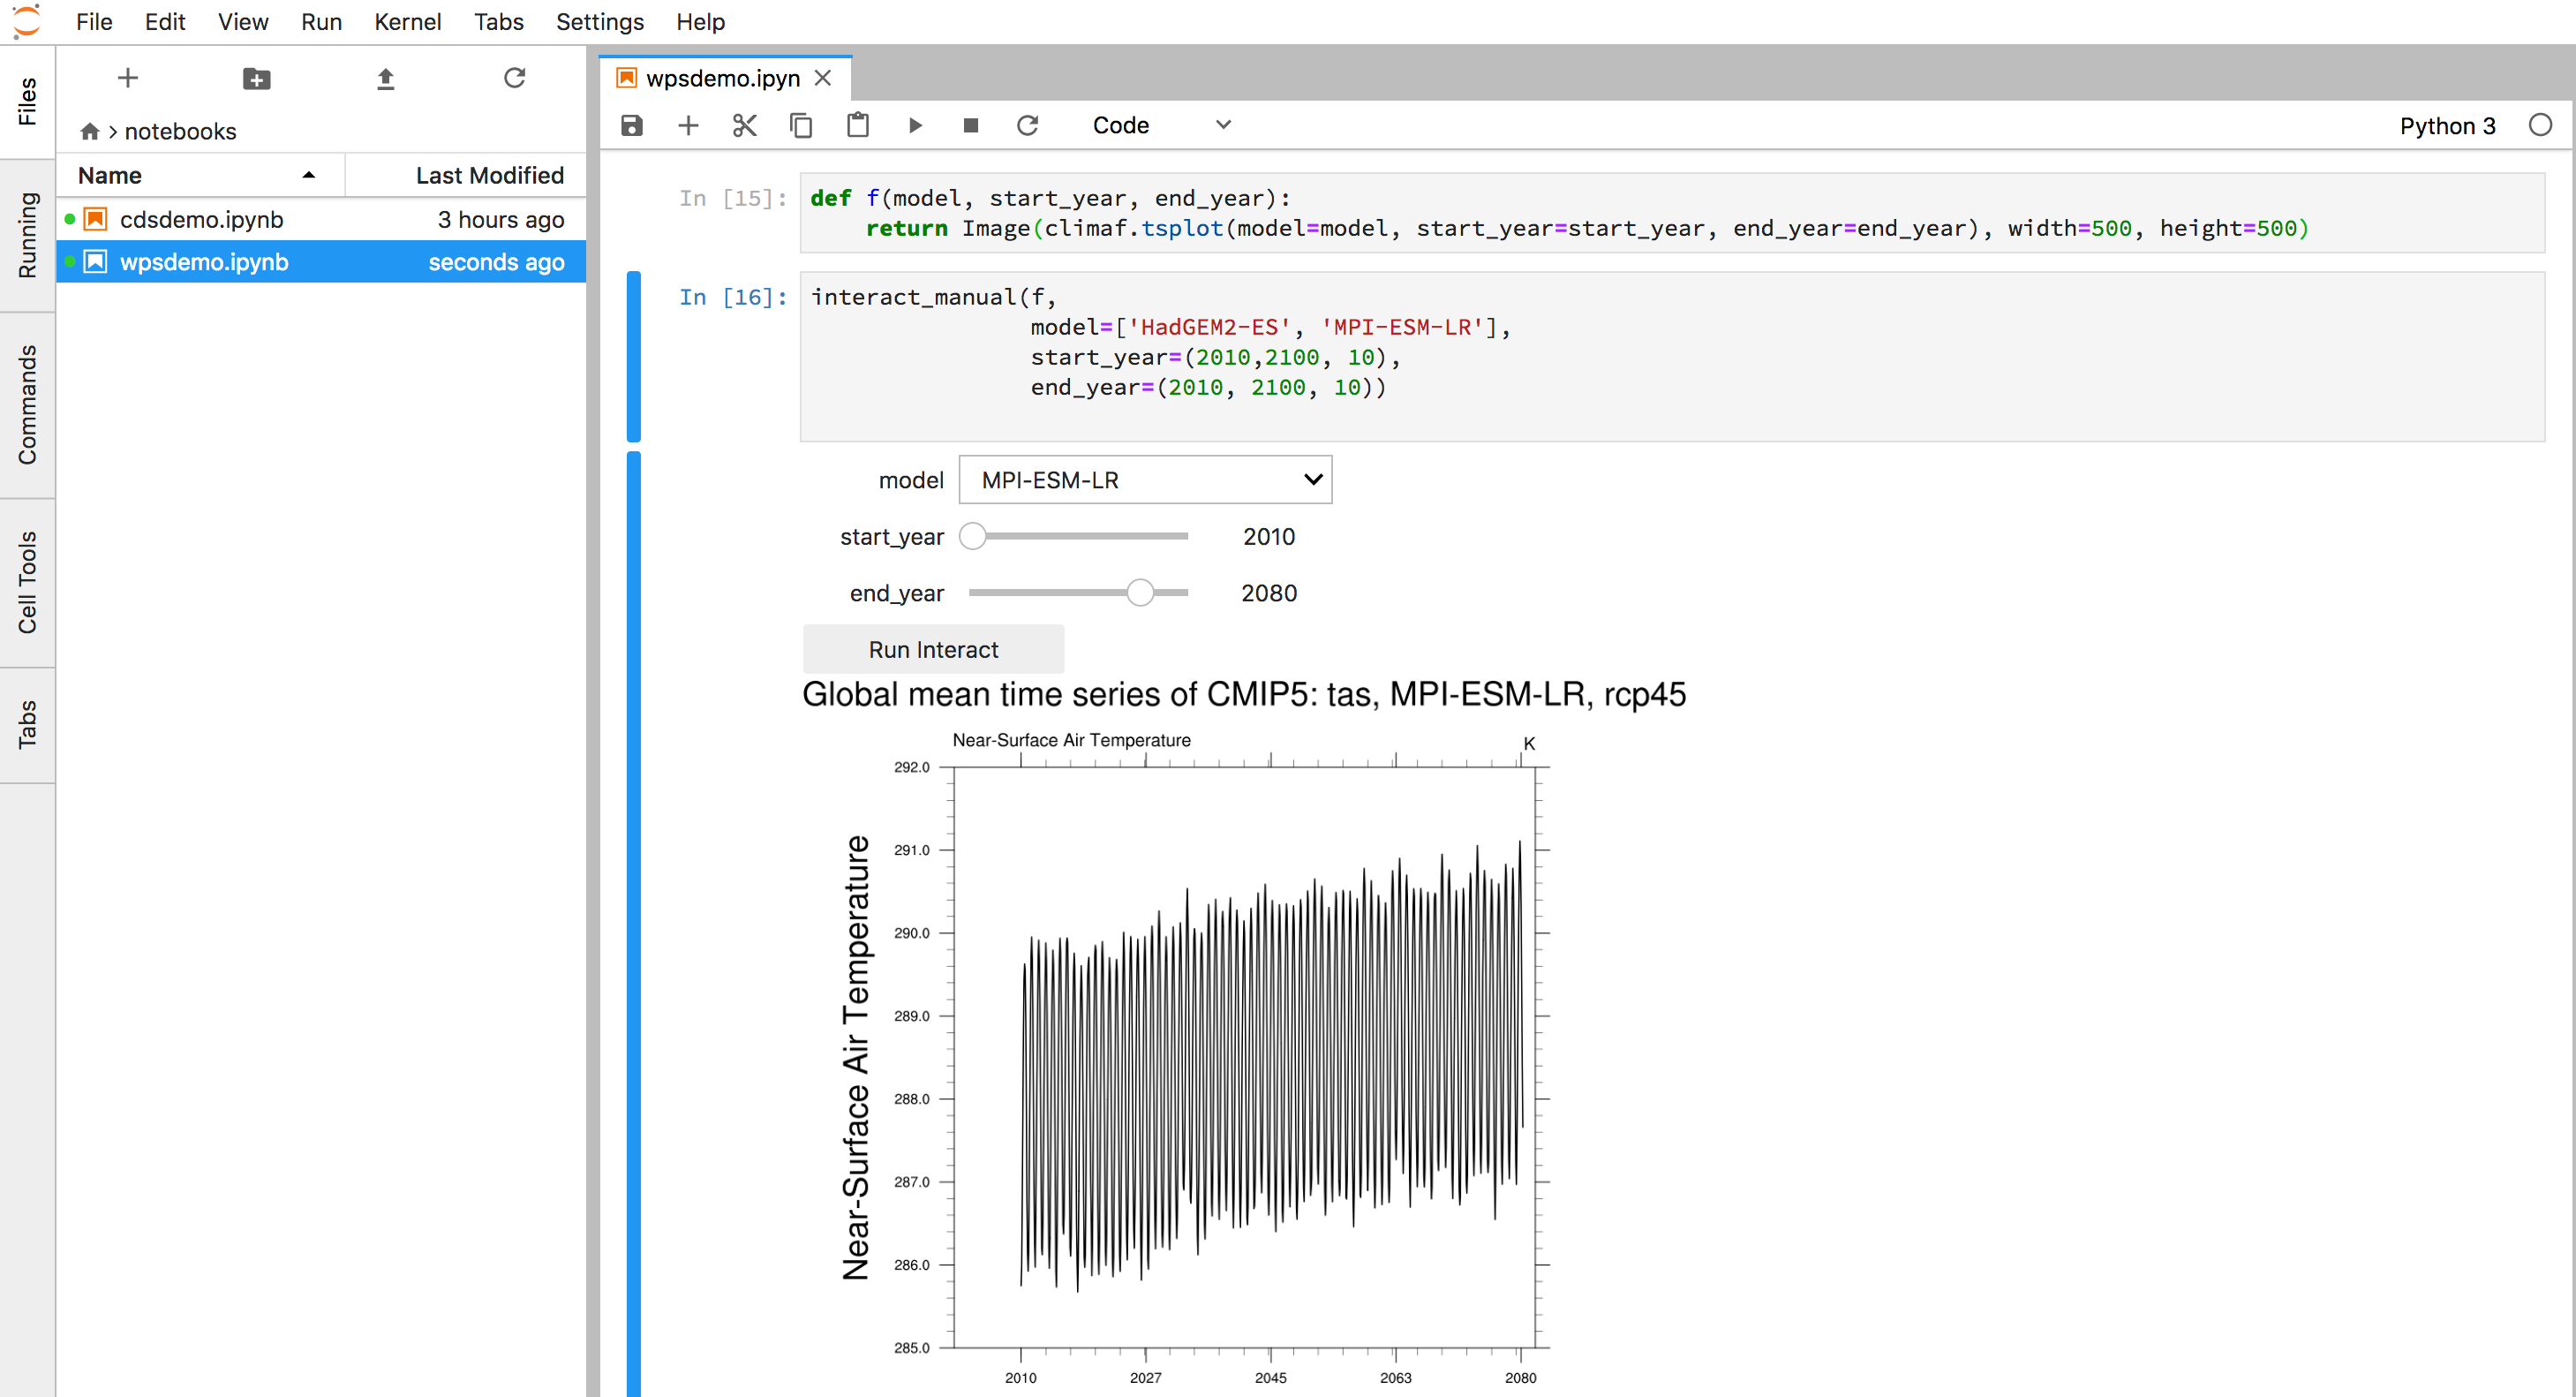
This notebook is using the birdy client to interact with the CliMAF WPS service.